
Have you always wondered how a vegan diet can be kind to you, the planet, and our animal friends? Do you want to hear from others in a community-centric space?
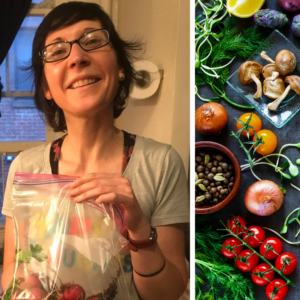
Beloved YD teacher and vegan chef extraordinaire, Toni shares her yummy take on Punjabi chole masala using simple, fresh ingredients. Join Toni on March 20th for a live virtual cooking demo of this easy and accessible recipe. All are welcome to join this free event! Sign up here.
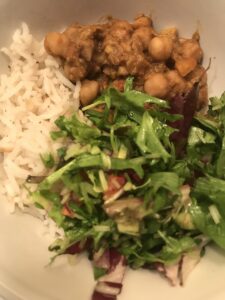
Punjabi Chole Masala (Chana Masala)- Full Flavored Vegan Goodness
Punjabi chole masala or chana masala is one of the most popular curry dishes from India. It is a staple on wedding menus in North India. It is also super easy to make, so comforting and all vegan.
Ingredient List:
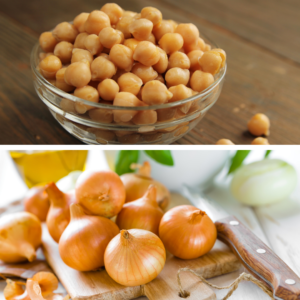
- Chickpeas (canned or cooked by you)
- Fresh ginger
- Onion
- Garlic
- Chole masala/spices of some kind (more on this later)
- Tomato
Step 1:
Take a can of chickpeas or pre-cooked chickpeas and have them ready. If using canned, look at label and choose a can that has non-BPA lining and no added preservatives or firmness agents to the beans. Label should read only chickpeas, water, and maybe salt.
If you cooked the beans yourself, make sure you let them soak overnight and changed the water. I cook mine in an old-school pot.
Step 2:
Chop onion and finely mince the ginger and the garlic.
Step 3:
The key to chole is the order in which you put the ingredients in the pot. Start with a small amount of oil of any kind–about a tsp and a half. Put the onions and ginger in and let them start sweating. Add the garlic a little bit later.
A little aside here: you are doing something ubiquitous in Indian cooking. It is called “tadka” or “tempering” in translation. It is a technique in which whole or ground spices are briefly roasted in oil to release their essential oils, thus making their flavor more aromatic.
Step 4:
Your local Indian store or speciality grocery stores such as Whole Foods would have something called “Chana Masala Mix” or “Chole Masala.” You could also make your own no-frills masala if you have cumin, turmeric, chili powder, and garam masala. This is really all that is needed, but a real treat of an ingredient is amchoor, or dry mango powder, that adds a delicious tanginess to the mix.
Step 5:
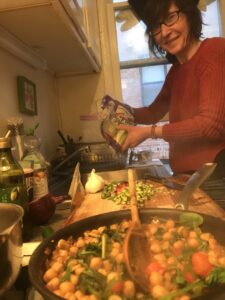
So now the spices and the onion+garlic+ginger have sweated and softened pretty well. You are smelling some good stuff already, I know! Add in the chickpeas and chop a small Roma tomato and add it in too. Bring to a boil once you have thrown in about 1.5 cups of water. Then, reduce to a medium heat and cook until the water has evaporated. I sometimes like to repeat this water adding business if I want everything to be really soft, but it is not necessary. Salt and hotness to taste, of course. If you are like me, add some chopped green chili pepper in there too because it can never be hot enough.
Step 6:
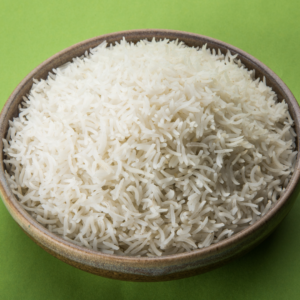
While the chole is cooking, get your basmati rice ready. I won’t go into the debate of whether white or brown rice is healthier–I think you should go with your taste buds on this one, and for me, *nothing* is better than fragrant basmati rice with chole. I eat plenty of brown rice but with other dishes.
The water: rice ratio for basmati is always 2:1, but I have to confess that I always eyeball it. I would tell you the pinky measuring technique, but I imagine you are probably laughing at me and can just use a measuring cup, unlike me.
Put the rice in the pot and begin washing it with hot tap water. Massage it lovingly (no, really) so that as much of the starch washes away as possible. Do this several times, until the water is not too cloudy. Then, after this final wash, add the water, add salt. I like to throw in aromatics like 3-4 whole cloves or a bay leaf or a cinnamon stick in here now. If you have any of this, do it as it is really a game-changer, I promise. Another trick is black pepper–rice, black pepper, and nutritional yeast is one of my all-time favorite simple meals.
Bring to a boil, and then reduce to a simmer. I like to add the lid here, but the lid is not fully on. It is at an angle. Once you see a bunch of holes/little craters form, fully close the lid and turn off the heat. Let it sit there for at least 5 mins.
Step 7:
Make a little salad to go with this with whatever veggies you have lying around. My go-to is cucumber, tomato, onion, lemon juice, but I like to add greens either into the chole or into the salad. Arugula or spinach, for some extra cultural mashing up. If you have pomegranates, put them in the salad, too!
This meal takes less than an hour to make, but it is such a comforting food that I have it at least twice a week. In fact, I always have it on Fridays, which went from Friyays to Cholay Friyay!!!! I am serious. Make yourself some of this chol-yeah!
